A flagpole ground sleeve is a hollow tube set into the earth, usually surrounded by a concrete footing, that receives the base of your flagpole and holds it upright. The pole slides in, the sleeve takes the load, and if you ever need to lower or replace the pole, the foundation stays right where you built it. Get the sleeve right, and your flag flies straight through decades of wind. Get it wrong, and no pole, however handsome, will stand true.
A flag is a promise made visible, and every promise needs a foundation. This guide walks you through what a sleeve does, how to match one to your pole, how to set it, and how to keep water, rust and shifting soil from undermining it.
TL;DR
- A ground sleeve is a tube buried in a concrete footing. Your flagpole slides into it, so the pole can be removed or replaced without disturbing the foundation.
- Match the sleeve to the pole: the inside diameter must fit your pole’s base, and the sleeve must suit the pole’s height, weight and material.
- Install it plumb, with the top just above grade, a free-draining base, and no concrete inside the tube. Let the footing cure fully before raising the pole.
- Tough soil, high wind zones or tall poles may call for a different foundation design, so check with a professional or your local building department.
Table of Contents
- What a Ground Sleeve Does for an In-Ground Flagpole
- Sleeve, Spike or Wall Mount: Which Support Fits Your Setup?
- How to Choose the Right Ground Sleeve
- Tools and Materials You Will Need
- Step-by-Step: Installing a Ground Sleeve
- Preventing Water, Rust and Movement
- When Soil, Weather or Height Change the Plan
- Replacing a Damaged or Missing Sleeve
- A Word on Respect and Daily Use
- Everything Above the Ground: Flags and Poles From Ultimate Flags
- Common Mistakes to Avoid
- FAQ
- Sources
What a Ground Sleeve Does for an In-Ground Flagpole
Think of the sleeve as a socket. A ground-set flagpole does not get buried directly in concrete. Instead, a sleeve is buried and the pole is lowered into it, which is why it is often called the sleeve-and-burial method. According to Construction Specifier, most flagpole installers and manufacturers in the United States favor this method for its simplicity and cost-effectiveness, while installations in Europe and the Middle East more often use a base plate with anchor bolts set in a concrete foundation.
The design solves three problems at once:
- Alignment. The sleeve fixes the pole’s angle at the moment the concrete sets. Whatever tilt you lock in, you live with.
- Serviceability. A pole set directly in concrete is stuck there. A pole in a sleeve can be lifted out for repainting, repair, or replacement.
- Protection. The sleeve keeps the pole’s base away from direct contact with wet concrete and soil, which is where moisture does its slow work.
Many residential ground-set poles ship with their own sleeve. If yours did, keep it with the pole’s paperwork. If you are starting from a different pole, or replacing a lost or damaged sleeve, you will want to match the replacement carefully, as covered below.
Sleeve, Spike or Wall Mount: Which Support Fits Your Setup?
Before you dig, make sure a ground sleeve is the right support for the flag you plan to fly. Our guide to flagpole types and footing rules for home or business compares the options in detail, but the short version is this:
| Support | Best for | Permanence |
|---|---|---|
| Ground sleeve with concrete footing | Full-size residential and commercial poles flown daily | Permanent |
| Ground spike | Lightweight feather flags and temporary displays | Temporary |
| Wall or house bracket | Porch-mounted flags on a small pole | Semi-permanent |
| Vehicle, boat or RV mount | Mobile displays | Portable |
If your flag is a short pole bracketed to the house, you do not need a sleeve at all. For a temporary event display, a feather flag pole with a ground spike kit is the lighter solution. But for a tall pole that will carry the Stars and Stripes through every season, the sleeve is the classic foundation.
How to Choose the Right Ground Sleeve
A sleeve is not a universal part. Four things decide the fit.
Inside diameter
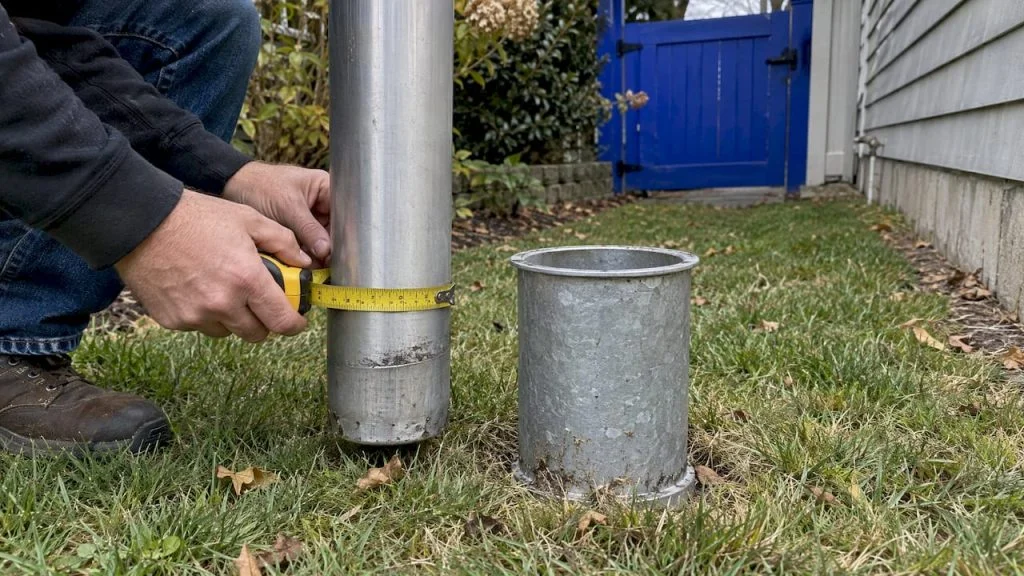
The sleeve’s inside diameter must be slightly larger than the base of your pole so the pole drops in without binding but does not rattle. Measure the outside diameter of the pole’s butt end, then compare it against the sleeve’s stated inside diameter. Some sleeves are sold by inside measurement, others by outside, so read the product description closely. A tight fit that you have to hammer is a poor fit, since it will make removal difficult later.
Pole height and load
The taller the pole and the larger the flag, the greater the overturning force at the base. Taller poles generally need larger sleeves and larger footings. Our flagpole height chart and safety checks explain the proportions that keep a pole in scale with its site, and our guide to house flagpole size helps you pick between a pole for a one-story and a two-story home. Settle the pole height first, then choose the sleeve, never the other way around.
Material
Sleeves are commonly made from corrugated steel, galvanized steel, or plastic such as ABS. Each has its place:
- Corrugated steel grips concrete well because the ridges lock into the footing. It should be galvanized or coated, since bare steel rusts underground.
- Galvanized steel resists corrosion and suits permanent installations.
- Plastic (ABS or similar) will not rust and is common with lighter telescoping and residential poles, though it is sized for the poles it is designed for.
Use the sleeve your pole manufacturer specifies when there is one. The maker knows the pole’s wall thickness, base diameter and intended load.
Length and accessories
Sleeve length varies. Longer sleeves support a pole more deeply and suit taller installations. Some include a lightning spike or ground rod at the base, a stop bolt or a cap to keep debris out. If your pole carries a halyard (a rope and pulley system), note that the sleeve does not affect it, but it is wise to check the pulley and rope condition while the pole is out of the ground.
Tools and Materials You Will Need
Gather everything before you dig. Setting concrete is not a job to pause midway.
- Post-hole digger or auger, and a shovel
- The ground sleeve and the flagpole itself
- Gravel or crushed stone for drainage
- Ready-mix or bagged concrete, plus a wheelbarrow or mixing tub
- A 4-foot level, and boards or stakes to brace the sleeve
- A tape measure
- Crumpled newspaper, a rag, or a cap to plug the sleeve mouth
- A trowel for finishing the surface
- Work gloves and eye protection
Before any digging, call 811 in the United States. It is the national call-before-you-dig number, and it is how you learn where buried utility lines run. Overhead power lines matter just as much: choose a spot where a pole, a flag and a person on a ladder will never come near a wire.
Step-by-Step: Installing a Ground Sleeve
The sleeve’s own instruction sheet or your pole maker’s guide governs hole size and footing dimensions for your exact model, so follow it first. The sequence below is the common pattern for a residential sleeve-and-burial installation.
1. Mark and dig
Pick a level, open site with firm ground, clear of wires, trees and your home’s roofline. Dig a hole to the depth and width the manufacturer specifies, which is wider than the sleeve so there is room for a solid ring of concrete all around it. Keep the walls as straight and undisturbed as you can.
2. Prepare the base
Add a layer of gravel at the bottom and tamp it down. The gravel gives water a path away from the sleeve’s base. Water that sits at the bottom of a sleeve is the main cause of rust and of freeze damage in cold climates.
3. Place the sleeve
Lower the sleeve into the hole. Plug the opening so concrete cannot fall inside. Crumpled paper works, or the cap that came with the sleeve. The top of the sleeve should end up just above ground level, so surface water runs away rather than into it.
4. Level and brace
Place the level against two sides of the sleeve, a quarter turn apart, and adjust until it reads plumb on both. Brace it with stakes or boards so it cannot drift while you pour. This is the most important step in the whole job. Check it again after each stage.
5. Pour the concrete
Mix and pour concrete around the sleeve in stages, working it down with a stick or shovel to remove air pockets. Keep the concrete outside the tube. Recheck plumb as you go.
6. Check with the pole
While the concrete is still wet, many installers lower the pole into the sleeve to confirm it stands plumb, then lift it back out and let the footing set. The pole also tells you whether the sleeve is tilted in a way the level alone might not have shown.
7. Finish and cure
Smooth the surface with a trowel, sloping the top of the concrete slightly away from the sleeve so rain drains outward. Then wait. Do not rush the cure: read the concrete bag for its curing time, and give the footing longer in cold or damp weather. Raising a pole into a green footing invites a leaning pole later.
8. Raise the pole
With the footing cured, lift the pole into the sleeve with a helper, working away from any wires. Tall poles are heavy and awkward, so never attempt one alone. Keep the pole’s cleat at a comfortable height for tying off the halyard; our note on where to mount the flagpole cleat will help.
Preventing Water, Rust and Movement
A well-set sleeve should outlast several poles. A few habits help it get there.
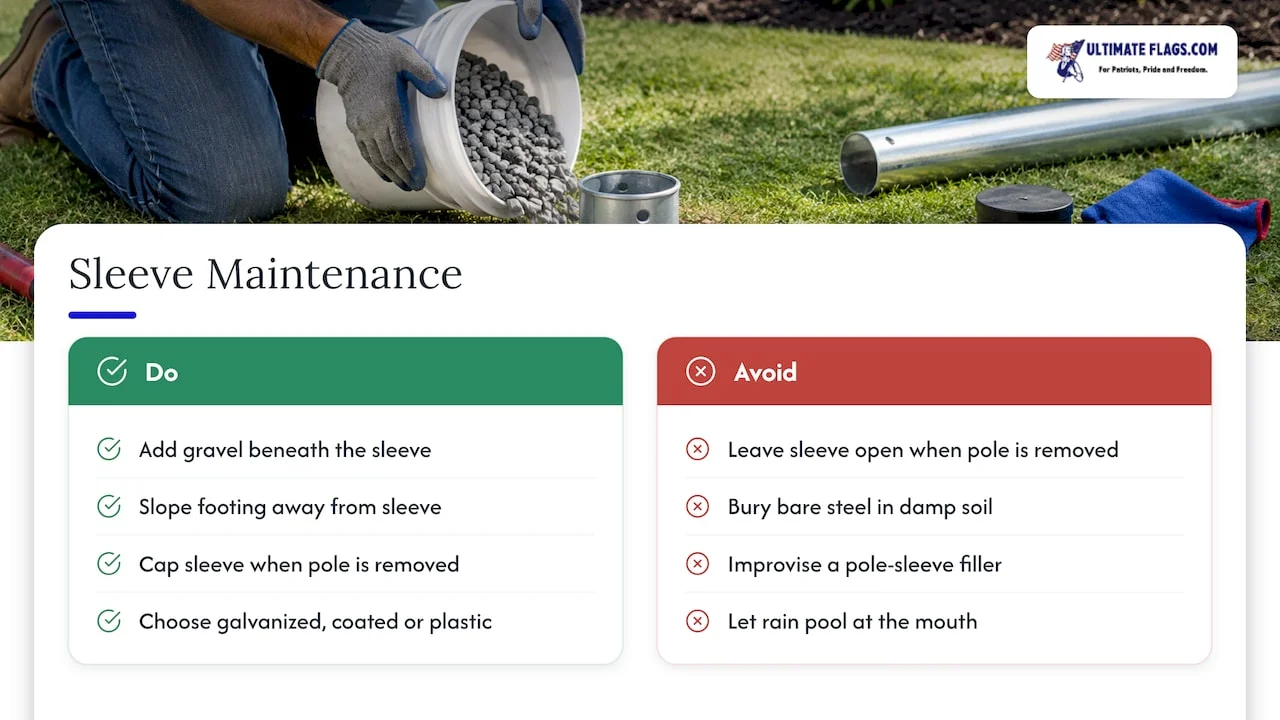
Drain it. Gravel beneath the sleeve, and a footing that slopes away from it, keep water from collecting. If your sleeve is open at the bottom, the gravel does the rest. If it is sealed, make sure rain cannot pool at the mouth.
Keep it covered. When the pole is removed, cap the sleeve. Leaves, insects and standing water are all invited by an open tube.
Pick the right metal. Bare steel buried in damp soil will corrode. Choose a galvanized, coated or plastic sleeve, and look it over whenever the pole comes out.
Watch the pole’s base. Many installers slip a thin protective layer or sleeve liner between pole and sleeve to stop metal-on-metal sticking. Follow your pole maker’s recommendation rather than improvising, since the wrong filler can trap water.
Check for lean. Every season, stand back and sight the pole against a building corner or a plumb line. A slight lean that grows year to year signals that soil is shifting or the footing was not set solidly.
When Soil, Weather or Height Change the Plan
Sleeve-and-burial is the usual answer, but not the only one. The authors of the Construction Specifier article advise that, for projects above standard height or in unusual conditions, the first step is a geotechnical report, because unusual soil or weather may make the typical sleeve-and-burial method inappropriate and call for a base plate with anchor bolts in a concrete foundation instead.
For a homeowner, that translates into practical questions worth asking before you dig:
- Is the soil loose sand, soft clay, fill or sloped ground? Poor soil gives a footing less to push against.
- Do you live in a high-wind corridor or a hurricane zone? Wind loads rise sharply with pole height and flag size.
- Does your area have a deep frost line? Frost can heave a shallow footing.
- Does your city, county or homeowners’ association require a permit or limit pole height? Rules vary widely by place, so ask your local building department before you buy.
If the answer to any of these is uncertain, a licensed contractor or engineer can size a footing for your site. That is not a detour; it is how a pole of any real height stays standing through a storm.
Replacing a Damaged or Missing Sleeve
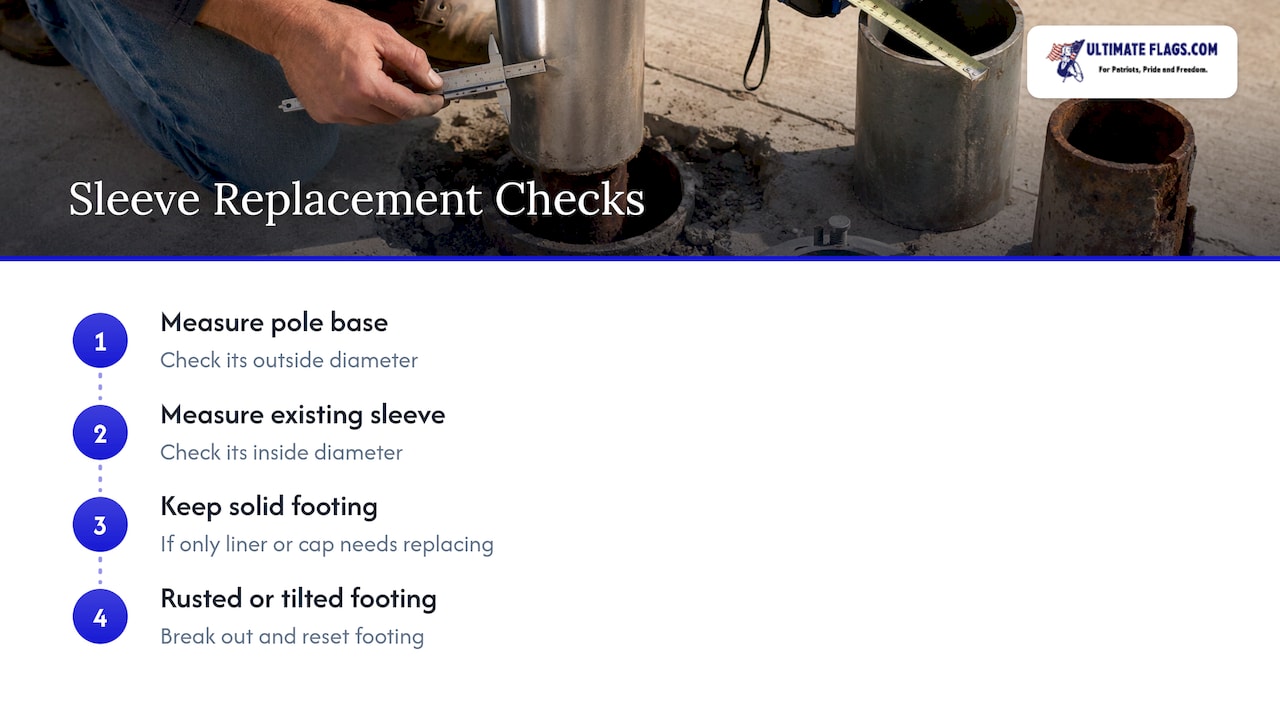
A sleeve can be lost with a pole, or crushed during a move, or simply be the wrong size for a pole you bought later. Replacement is possible, but it takes care. Measure the pole’s base outside diameter, then the inside diameter of any existing sleeve. If the old sleeve is still solid in its footing and only needs a new liner or cap, you may be able to leave it alone. If it is rusted through or tilted, the footing usually has to be broken out and reset, which is a bigger job than the first installation.
A Word on Respect and Daily Use
A solid foundation is where good flag etiquette begins. A pole that leans or sways with a heavy flag is hard to raise and lower with dignity. Once your sleeve and pole are set, take a look at how you hang and store the flag. Our guide to flag header and grommet spacing helps you mount a flag so it flies cleanly and wears evenly.
Perspective
We have spent years in the company of flags, and one lesson comes back again and again: the banner gets the glory, but the foundation does the work. A flag that snaps proudly over a front lawn on a stormy Fourth of July owes that moment to a plain steel or plastic tube nobody sees.
That is why we treat the ground sleeve as seriously as the flag on top of it. As America’s oldest online flag store, we have watched generations of customers raise colors for family, for country, for those who served. The ones who are still flying them years later set their poles true on day one.
Our advice is simple. Choose the flag that tells your story, choose a pole in proportion to your property, and give both a footing worthy of what they stand for. Plan the foundation first, measure twice, and let the concrete cure fully. A flag raised on solid ground can wave for a lifetime.
John Hough
Everything Above the Ground: Flags and Poles From Ultimate Flags
Once your footing is ready, we can help with what goes in it and what flies from it. Browse our flagpoles and hardware to pair a pole with the rest of your setup, then choose the colors you want to fly from our American flags, state flags, military and service flags, and historic banners. You can see the whole range in our flag collections.

Whether you are honoring a veteran, flying your state’s colors, or telling a piece of American history through cloth and thread, we offer flags in a range of designs, along with the hardware to fly them. Not sure which pole style suits your yard? Start with our flagpole types and footing guide.
Common Mistakes to Avoid
- Skipping the level. A sleeve that is a few degrees off will look more crooked with every foot of pole height.
- Letting concrete into the sleeve. Once it hardens inside, the pole will not seat and the sleeve is ruined.
- Digging without checking for lines. Always call 811 first.
- Ignoring drainage. Standing water is the quiet destroyer of buried metal.
- Raising the pole too soon. Give the footing its full cure time.
- Choosing the sleeve last. Pole, flag size and sleeve should be planned together.
FAQ
Do I need a ground sleeve for every in-ground flagpole?
Most ground-set poles are designed to sit in a sleeve, since it keeps the pole removable and the alignment fixed. Some small or temporary poles use a spike instead. Follow your pole maker’s instructions, because they specify the support the pole was built for.
Can I use the sleeve that came with my old pole on a new one?
Only if the new pole’s base fits the sleeve’s inside diameter and the sleeve is sound and plumb. Measure both before you decide. If the sleeve is rusted or leaning, replace it rather than force a fit.
Should the sleeve sit above or below ground level?
It should end just above the surrounding grade, so rain runs away from the opening instead of pouring into it. Slope the finished concrete away from the sleeve for the same reason.
What if my soil is sandy, soft or prone to frost heave?
Poor soil and harsh weather can make the standard sleeve-and-burial method unsuitable, according to professional specification guidance. For tall poles or difficult sites, ask a licensed contractor or engineer to size the foundation, and check local rules with your building department.
How do I keep water out of the sleeve?
Set it on a gravel base, keep the top slightly above grade, slope the concrete away, and cap the opening whenever the pole is out. A galvanized, coated or plastic sleeve also resists rust if some moisture does get in.
Sources
- Specifying Flagpoles: Exploring standards and common errors, Construction Specifier
- Specifying Flagpoles (PDF reprint), Construction Specifier