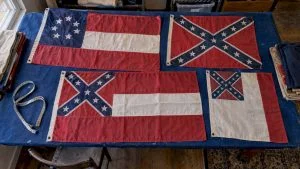
A flag header is a reinforced strip sewn along the hoist side of the flag, and grommets are the metal or plastic rings set into that strip at regular intervals. Together, they form the sturdiest attachment method a flag can carry, built to withstand wind, sun, and the daily strain of flying outdoors. Choose this finish for large flags, exposed poles, and any banner meant to fly hard through every season.
TL;DR:
- Grommets should be chosen in size and spacing based on flag dimensions, with 4 to 5 inches apart and at least 2 inches from edges for optimal load distribution.
- Heavy-duty headers made of reinforced canvas or webbing are necessary for large flags exposed to constant wind, while lightweight fabrics suit smaller or decorative flags.
- Installing grommets requires careful measurement, proper tool use, and optional reinforcement to prevent tearing, especially on high-wind outdoor flags.
- For flags over 4×6 feet or flown on halyard poles, header and grommets provide durability and flexibility that sleeves cannot match.
- Regular maintenance, including cleaning salt residue and replacing worn hardware, extends the lifespan of grommeted flags in outdoor conditions.
Table of Contents
- What Are Flag Headers and Grommets, Exactly?
- Header and Grommets vs. Pole Sleeve: Which Finish Wins?
- Grommet Sizes, Header Materials, and Spacing That Actually Holds
- How to Install Grommets in a Flag Header: Step by Step
- When Header and Grommets Makes the Most Sense
- Keeping Your Grommeted Flag in Fighting Shape
- Why Trust This Guide on Flag Construction
- Find Flags and Grommet Hardware Built for the Job
- Sources
- FAQ
What Are Flag Headers and Grommets, Exactly?
The header is the unsung workhorse of a well-built flag. It runs along the hoist edge as a double-folded strip of heavy canvas or webbing, sewn tight to keep the fabric from stretching, curling, or tearing loose under wind load. Without it, the flag’s edge would fray within a season of hard flying, and every gust would put direct strain on threads never meant to bear that weight.
Grommets are the rings punched through that reinforced strip. Each one has a top half, a bottom half, and often a washer sandwiched between them for extra grip. Brass and zinc grommets dominate the outdoor market because they shrug off corrosion and hold their shape under repeated stress, while plastic grommets serve lighter, indoor-facing needs.
The header and grommets combination distributes the pull of wind across multiple reinforced points instead of concentrating it on one weak seam. That’s the entire engineering principle behind why this finish outlasts nearly every other option:
- The header spreads tension across the whole hoist edge, not one stress point.
- Grommets create individual anchor points that share the load between them.
- Metal construction resists the deformation that plastic and unreinforced fabric suffer under constant flapping.
Header and Grommets vs. Pole Sleeve: Which Finish Wins?
A pole sleeve, sometimes called a pole hem, is a fabric tube sewn along the hoist edge that slides directly over the pole. There’s no hardware involved, no rings, no punched holes. The flag simply slips on like a sock and hangs there, which makes it the quicker option for parade staffs, wall-mounted display poles, and indoor settings where a pole sleeve finish does its job with no fuss.
Header and grommets pull ahead in every category that matters for serious outdoor duty:
- Durability: Grommets and reinforced canvas survive years of wind cycling; sleeves stretch and lose shape faster.
- Ease of hanging: Sleeves win here. No tools, no halyard, just slide it on.
- Visibility and movement: Grommeted flags fly freer on a halyard, catching wind at multiple points rather than binding to the pole shaft.
- Best flag sizes: Sleeves suit smaller flags (3×5 feet and under) on fixed poles. Header and grommets handle 4×6, 5×8, and larger flags built for real exposure.
If your flag rides a halyard and pulley system, header and grommets is the only sensible choice. If it’s slipping onto a stationary bracket pole for a porch or entryway, a sleeve keeps things simple.
Grommet Sizes, Header Materials, and Spacing That Actually Holds
Grommet diameter should scale with flag size. A 3×5 flag typically takes smaller grommets, while a 5×8 or larger flag needs a wider ring to handle the added wind load without tearing loose. Matching the grommet to the flag’s weight class is the single most overlooked step in flag construction.
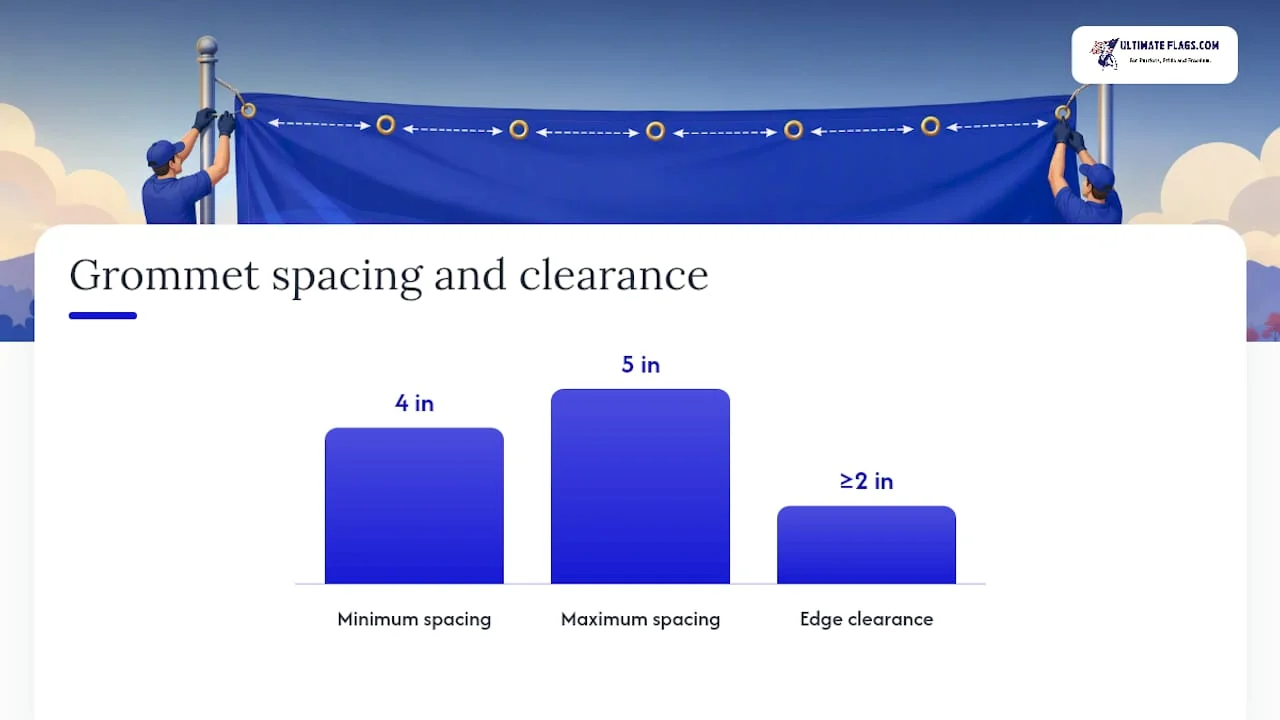
Spacing matters just as much as size. A well-tested standard places grommets about 4 to 5 inches apart along the header, with at least 2 inches of clearance from the flag’s edge, and every grommet should sit an equal distance from its neighbors to keep the load balanced across the whole hoist side.
Recommended header materials by exposure:
- Heavyweight canvas or webbing for large flags flown in constant wind.
- Reinforced double-fold cotton or polyester blends for mid-size residential flags.
- Lighter canvas strips for smaller decorative or seasonal flags with less wind exposure.
Uneven spacing is the quiet cause of most premature grommet failures. When one grommet carries more strain than its neighbors, it stretches, tears, and eventually rips clean through the header, taking the surrounding fabric with it.
How to Install Grommets in a Flag Header: Step by Step
Setting your own grommets is a satisfying, hands-on task, and it rewards patience over speed. Rush the marking stage and every grommet after it will sit crooked.
Tools you’ll need:
- Grommet setting kit (setter, base/anvil, and matching bit)
- Hole punch or sharp scissors
- Hammer or mallet
- Marking pencil or fabric chalk
- Fray-check sealant or interfacing (for fabrics prone to unraveling)
Step-by-step installation:
- Measure and mark. Lay the header flat and mark each grommet position, keeping them roughly 4 to 5 inches apart and at least 2 inches from the top and bottom edges.
- Reinforce if needed. Apply interfacing or fray-check to any fabric that looks prone to tearing once you punch through it.
- Punch the hole. Cut a clean, consistent hole at each mark on a hard, flat surface.
- Insert the grommet halves. Place the raised, taller half underneath the fabric and the washer or flat half on top.
- Set on the anvil. Position the assembled grommet on the anvil base of your setting kit, matching the bit size to your grommet diameter.
- Crimp firmly. Strike the setter with a hammer until the grommet flares and seats tight against the fabric on both sides.
- Check the seating. Tug gently on each grommet to confirm it’s locked in place with no wobble.
Pro Tip: Always test your grommet setter and bit size on a scrap piece of the same fabric before touching your actual flag header. A crimp that’s too loose or too tight ruins the fabric around it, and there’s no undoing a bad first attempt on the real thing.
Plastic grommets follow a similar sequence but snap together by hand pressure rather than a hammer crimp, which makes them forgiving for lightweight indoor projects. If you’re working with metal grommets and things go sideways, misaligned holes usually trace back to rushed marking, while a loose crimp almost always means the bit size didn’t match the grommet. A ripped header is nearly always a sign the fabric needed interfacing before you ever picked up the punch.
When Header and Grommets Makes the Most Sense
Outdoor flags flown on halyard poles, and anything sized 4×6 or larger, call for header and grommets without much debate. The reinforced hoist edge and multiple anchor points hold up against sustained wind in a way lighter finishes simply can’t match.
- Large ceremonial, memorial, or commemorative flags flown daily benefit most from this finish.
- Indoor wall displays or fixed decorative poles often do fine with a simpler sleeve or tab finish.
- Header and grommets pairs naturally with halyards, snap rings, and clip hardware, giving you far more flexibility across different pole types than a sewn sleeve ever will.
Keeping Your Grommeted Flag in Fighting Shape
A flag lives or dies by how well you maintain its hardware. Inspect grommets regularly for corrosion, especially near coastlines where salt air eats through cheaper metal fast, and watch for any grommet that’s started to loosen or spin freely in its hole.
- Rinse salt residue off the header periodically if you’re flying near the ocean.
- Replace worn snap hooks or clips before they fail mid flight.
- Reinforce a stressed header with interfacing before a small tear becomes a full blowout.
Pro Tip: If a single grommet tears out but the surrounding canvas is still sound, you can often patch and reset a new grommet slightly beside the old hole rather than replacing the entire header. Once two or more grommets have failed or the canvas itself has thinned, it’s time to retire the header and start fresh.
Why Trust This Guide on Flag Construction
Some online flag retailers have served patriotic Americans, collectors, and history enthusiasts as longstanding sources, and that history shows in how they talk about the hardware holding a flag together. For anyone mounting a new banner, our guide on flagpole types and footing rules walks through compatible pole setups worth reading before you commit to a grommet layout. We sell flags and the hardware that supports them, and we say so plainly, because a reader who understands the mechanics makes a better buying decision.
— John Hough
Find Flags and Grommet Hardware Built for the Job
Once you know what a header should withstand, shopping for the real thing gets a lot easier. Some retailers carry finished flags constructed with reinforced headers and durable grommets already set to the spacing and sizing standards covered above, so you’re not left guessing whether a bargain flag will hold up past one storm season.

Larger flags, including 5×8 sizes built for barn mounts and tall poles, are worth a look if you need something sized for serious outdoor duty, or consider complementing your setup with a stylish Gulf of America Hat embroidered patch mesh back trucker hat. Browse our guide on choosing a large Confederate flag for barn or pole display for sizing cues that apply across most large-format flags we carry. If you’re outfitting a whole property or event, our Letter: The Age of Intolerance collection page is a good starting point for browsing finished options. If unsure which grommet size or header weight fits your pole and climate, consulting customer support from flag retailers can help you match the flag to the setup before purchase.
Sources
The installation steps and spacing figures in this guide draw from Lowe’s grommet installation walkthrough, which covers the three-step crimping process, wikiHow’s detailed spacing and reinforcement guide, and Garrett Wade’s tool and bit-sizing instructions for matching setters to grommet diameter.
FAQ
What Do Grommets Mean on a Flag?
Grommets are the metal or plastic rings set into a flag’s header that let you thread a halyard, rope, or hook through the hoist edge to fly it. They’re the anchor points that hold the entire flag to its pole or line.
Is It Illegal to Fly a Flag at Night Without a Light?
There’s no blanket federal law requiring illumination for a privately flown flag at night; guidance on lighting mainly applies to flags flown continuously as a symbol of respect, such as certain government or ceremonial displays. Check local ordinances if you’re flying a flag around the clock, since rules vary by municipality.
How Do You Attach a Flag With Grommets?
Thread a halyard or clip hook through each grommet and secure it to your pole’s pulley system or snap hooks, then hoist the flag to the desired height. The step-by-step grommet installation process covers how to set the grommets themselves before you ever attach the flag to a pole.
What’s the Difference Between a Flag Sleeve and a Grommet?
A sleeve is a fabric tube that slides directly over a pole with no hardware, while grommets are individual rings that require a halyard or hooks to attach. Sleeves suit fixed indoor poles; grommets suit halyard-equipped outdoor poles and larger flags built for sustained wind exposure.